Release Preview: Type improvements such as sharing types between systems and more configuration on individual templates and instances, giving managers and admins direct control at the entity level.
Creating types
In manage mode, select the change set button in the top navigation bar, then select ’+ Add Entity’ and ‘Type’.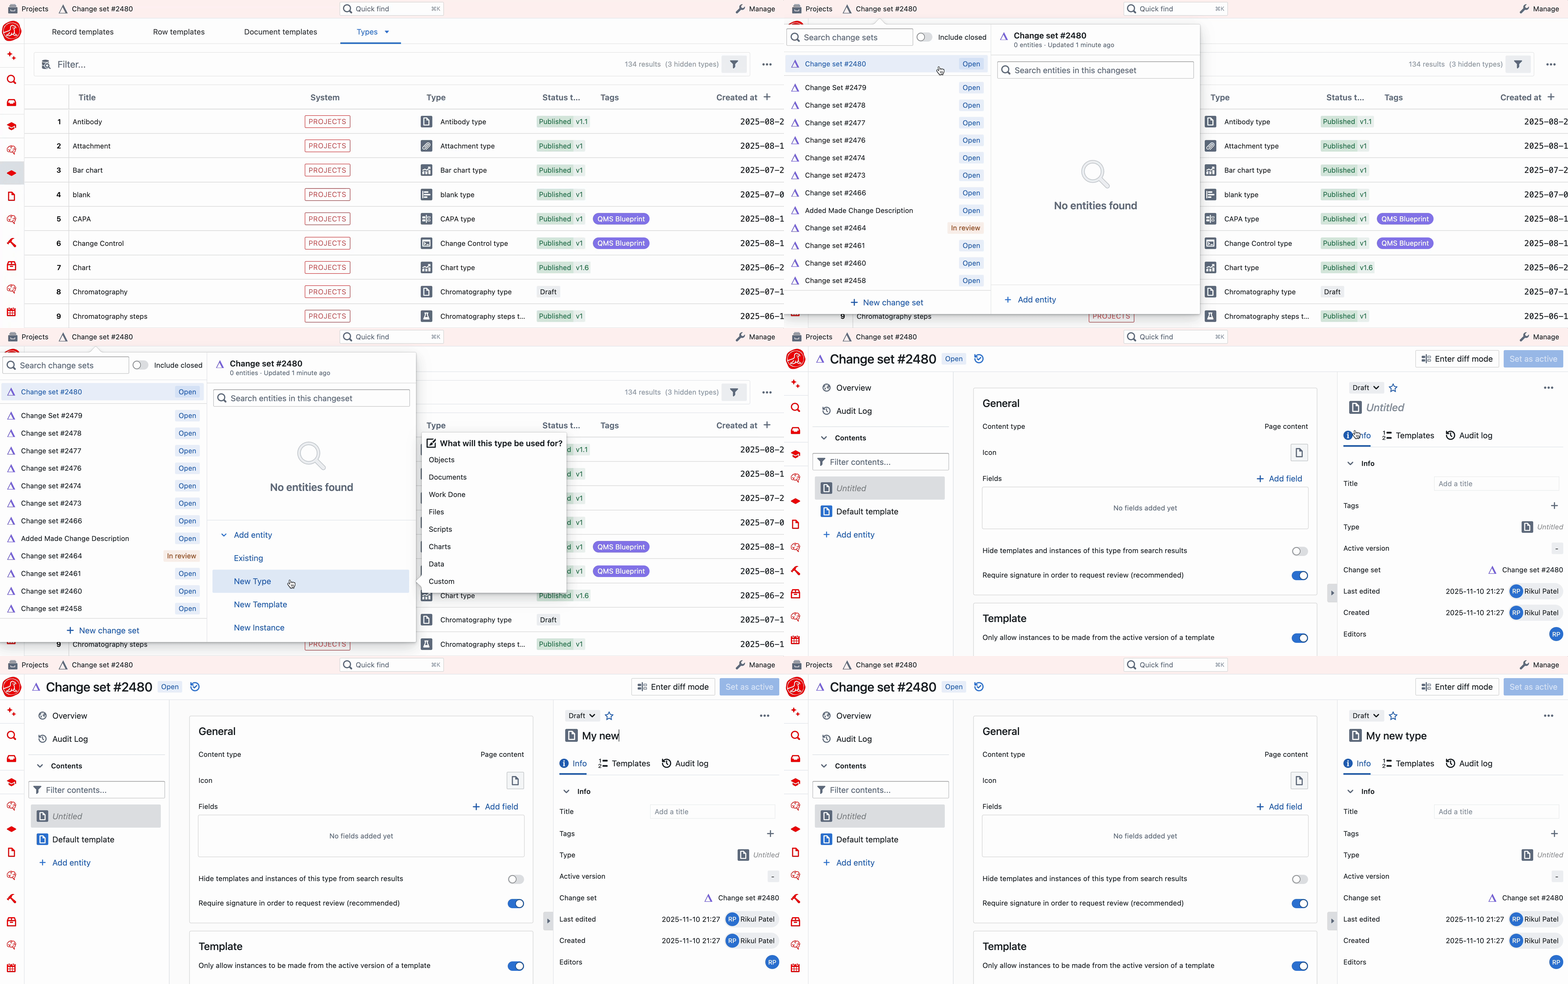
- Objects
- Documents
- Work Done
- Files
- Automations
- Charts
Custom types
Use a Custom type when none of the presets match the entity you want to model, or when you want to build the structure yourself from a blank starting point. A custom type is not a separate kind of entity - it is a normal type with no preset fields, content, status tags, or settings applied for you. After creating a custom type, configure it in the same way as any other type:- Choose the content model, such as page content, script code, chart, file, or no content.
- Add type fields that every entity of this type should carry.
- Configure status tags for templates and instances.
- Set review requirements and checks where this type needs controlled approval.
- Configure instance settings such as unique titles, version-number visibility, and active-version behaviour.
Configuring your type
Content
The content of your entity is what you will see on the page when you open a template or instance of this type.Type fields
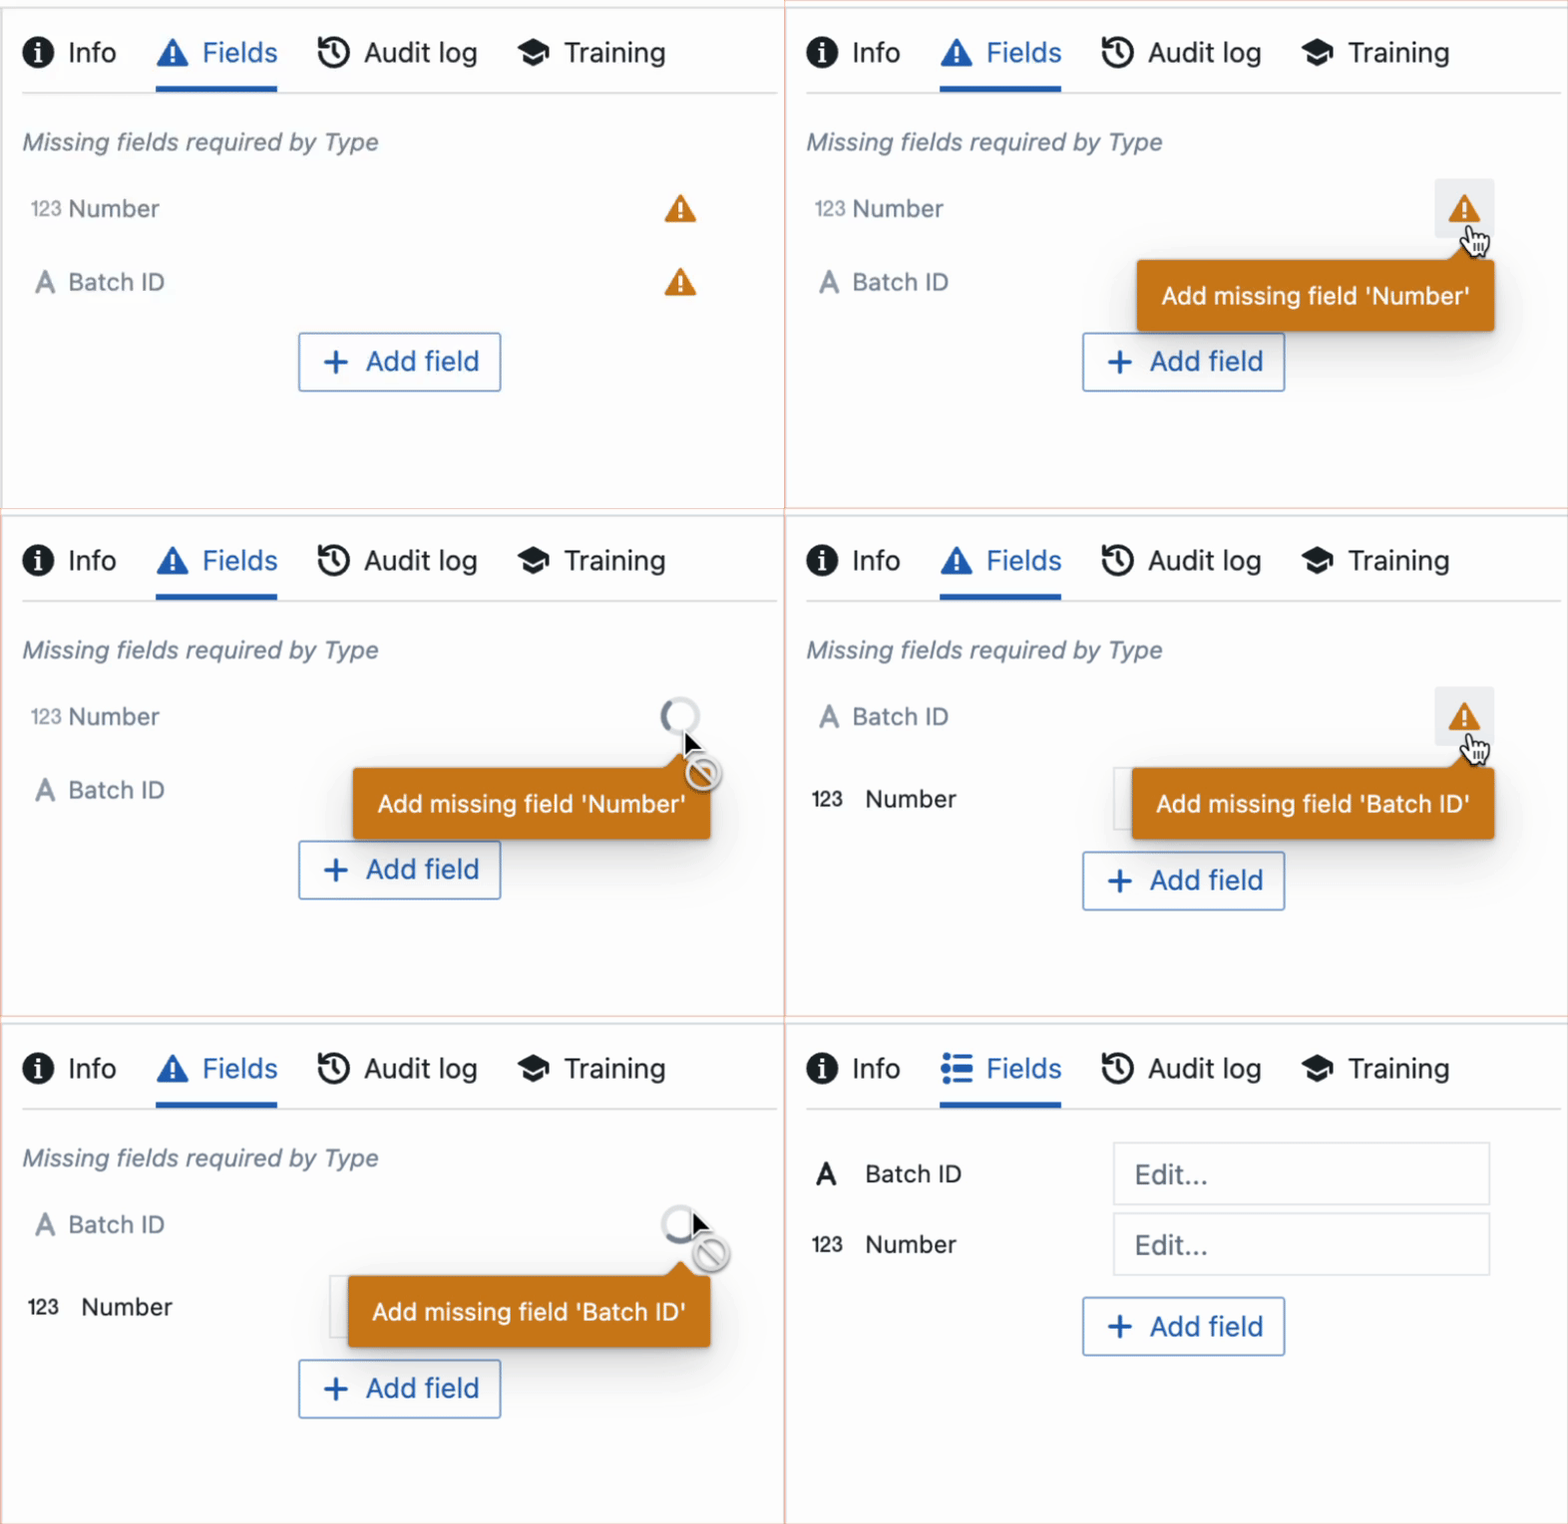
- Here you can add fields that should exist for all entities of that type. e.g. Date Created, Created By, Effective Date.
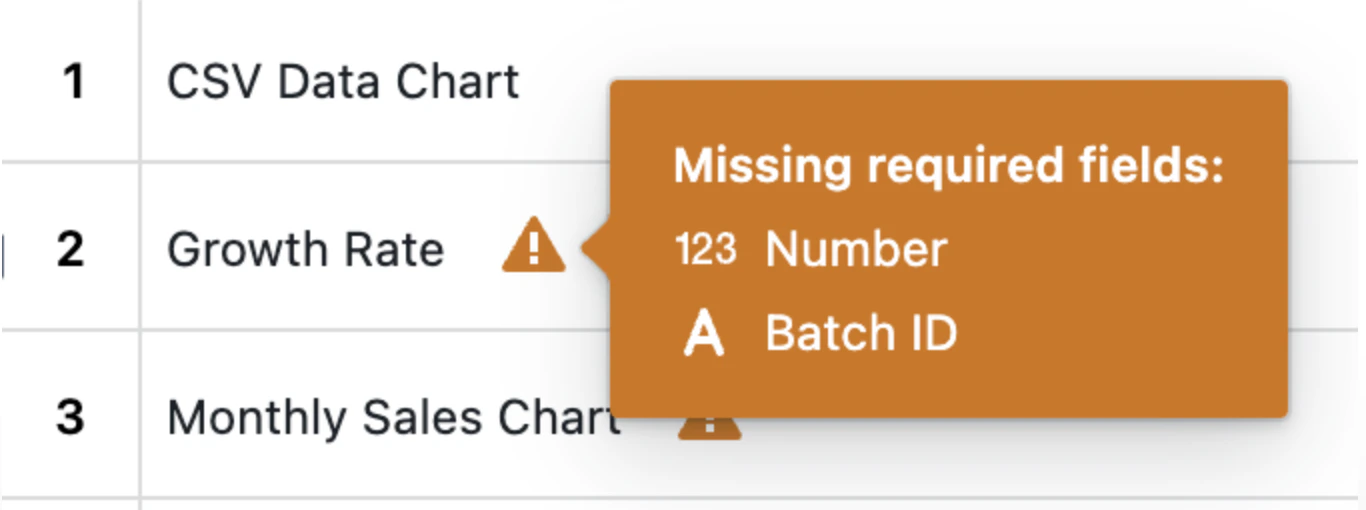
- Any entities of this type that do not have this field will show a warning. This also applies to pre-existing entities, if you are making edits to the type and add a field.
Status tags
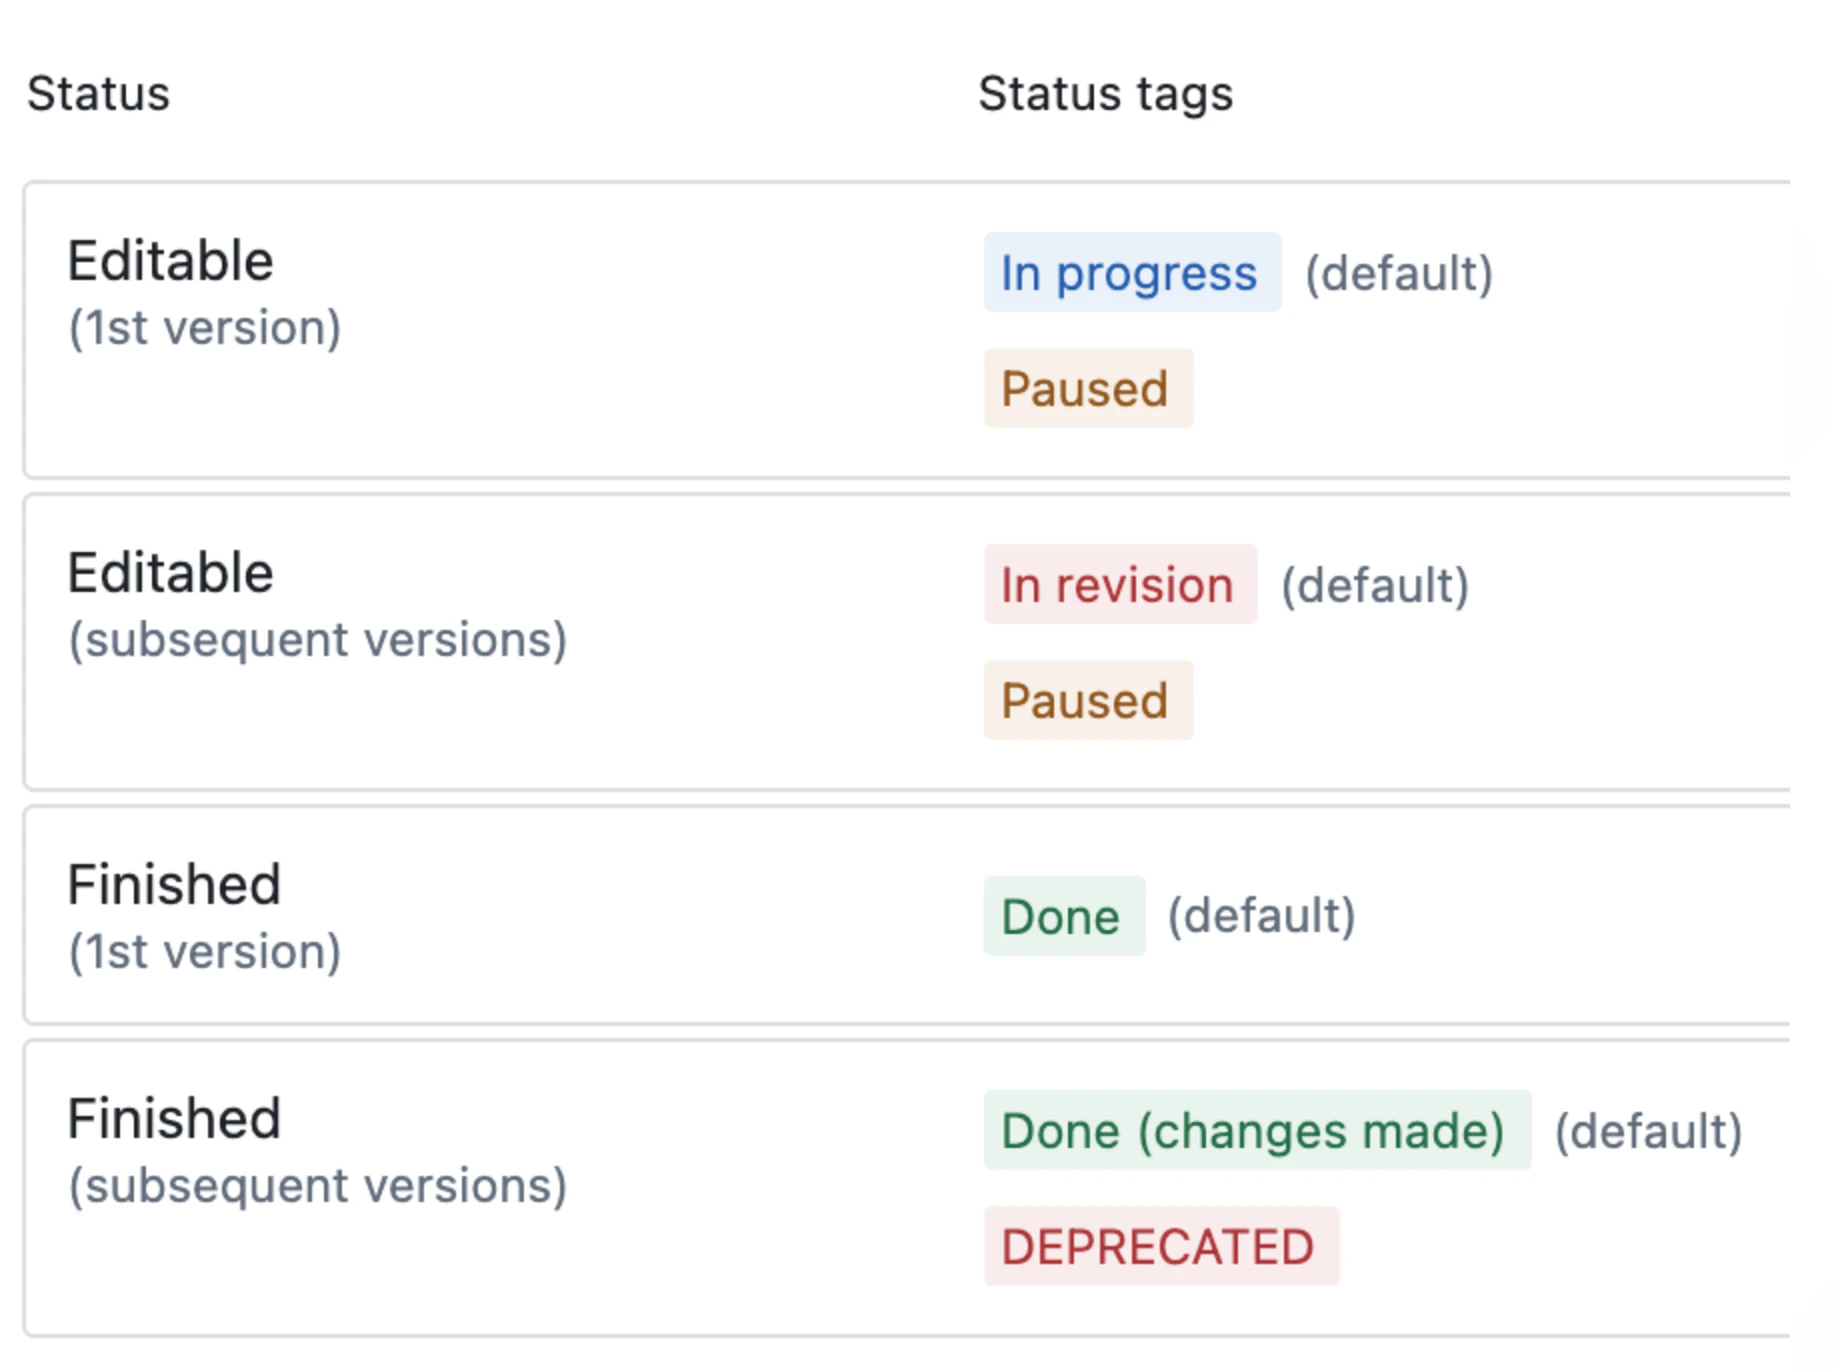
All entities have status tags, and these are different depending on whether the entity is published or in draft. By default, all entities have the following status tags: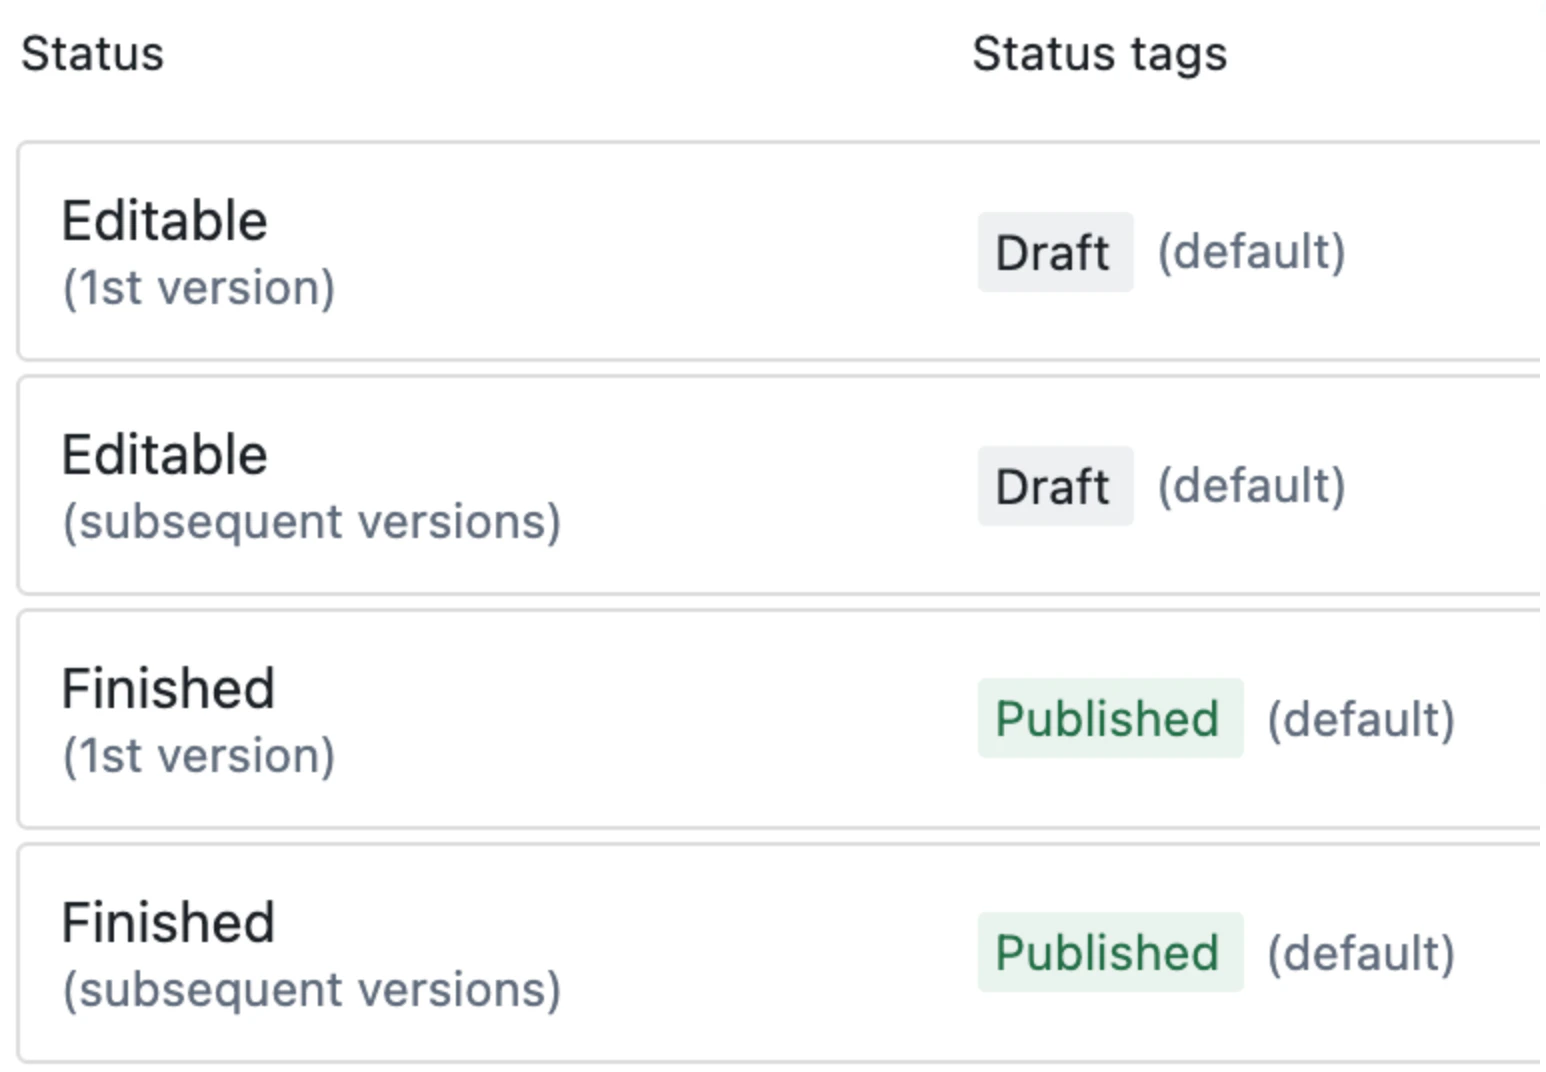
.gif?s=f2d6e9f00e71fc5c63cd1f7d242286b4 "Seal (11).gif")
Creating custom status tags on the fly
As you can see in the GIFs above, there is an option when selecting a status tag to+ New status tag . This allows you to make a new custom Status Tag while working. Any Status Tags made on the fly will not become options in other entities of the same type. If you wish to add a new option for the whole type, that should be done in the type settings.
Review requirements and checks
You are able to set mandatory review requirements and checks that must pass in order for templates and instances of this type to be published. These requirements can be different for templates and instances.Instance settings
In addition to the above, for instances, you can choose whether:- Unique titles should be enforced across instances
- Version numbers are relevant (e.g. for instances representing pieces of equipment, you may not care about the version number)
- Users should be able to select the active version, or if it should always be the latest
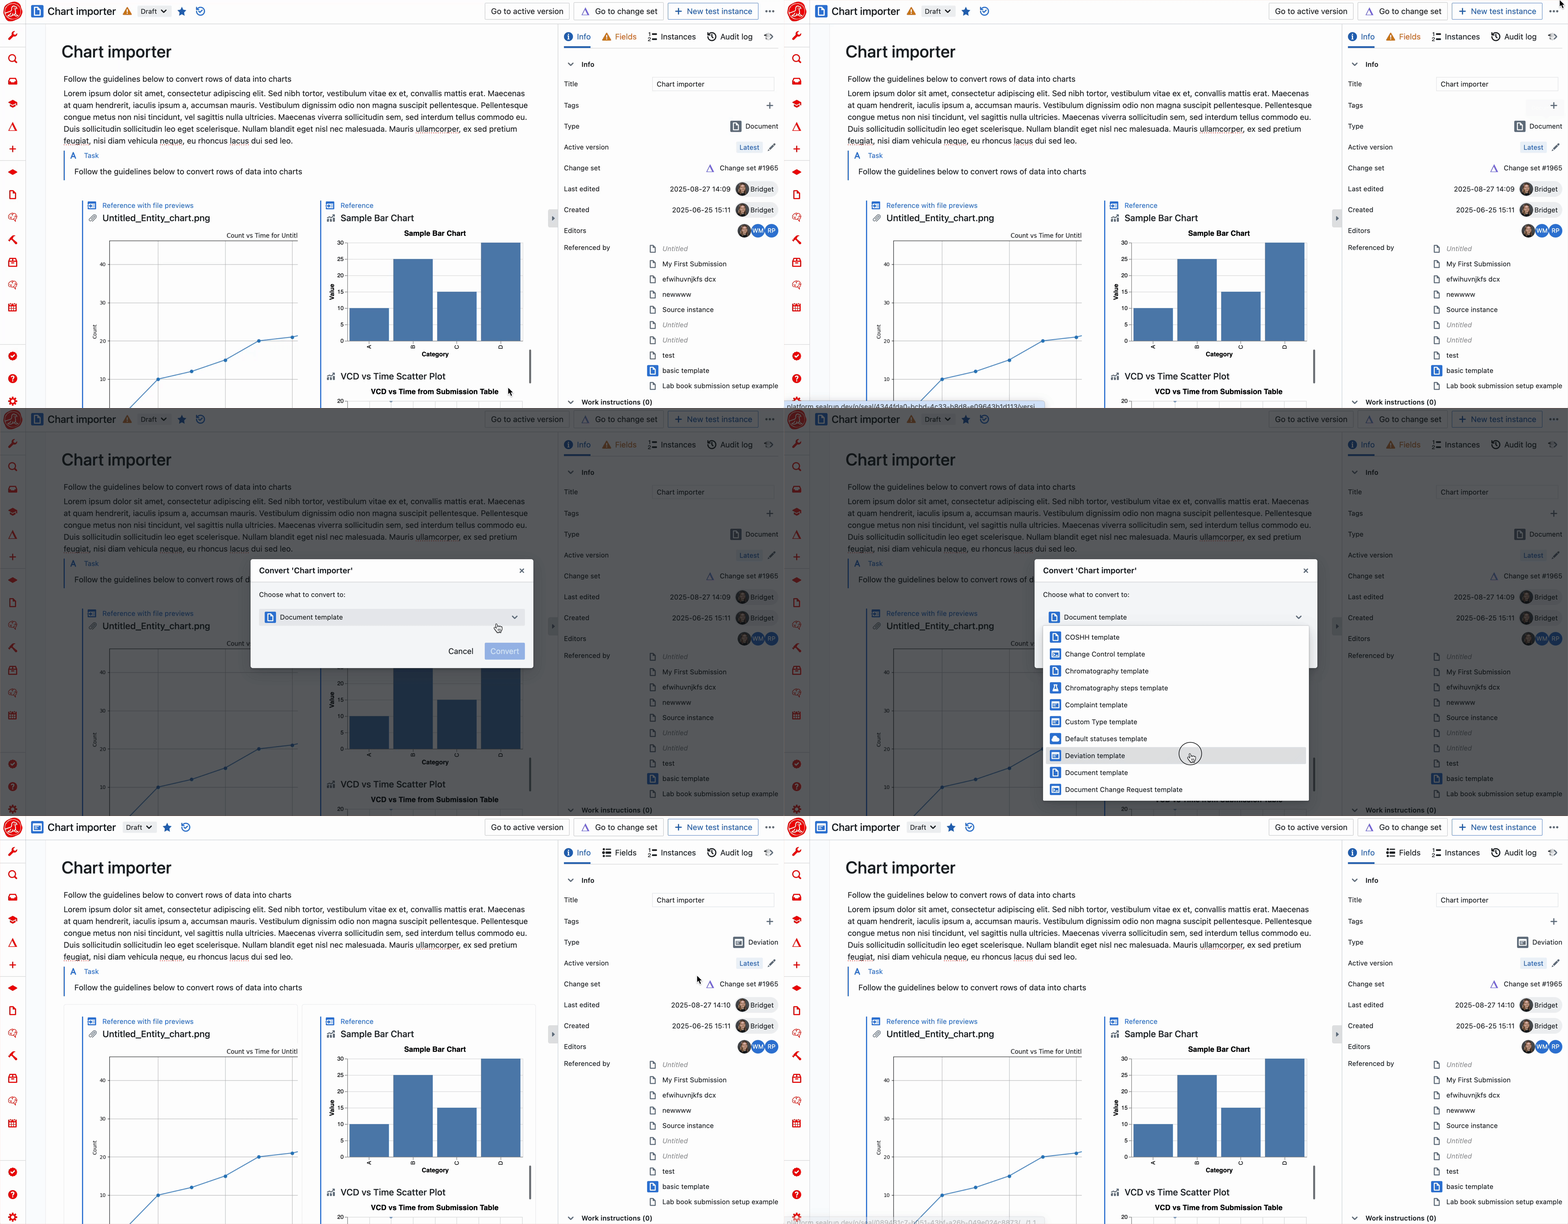
Converting between types
Entities can be converted between compatible Types.- Select the three-dot menu in the top right and choose convert
- Select a new Type, and click convert
- The change in Type will be reflected in the sidebar